

Introduction:
Mirrors, with their enchanting reflections, hold the power to elevate our living spaces. Yet, there comes a time when change beckons, and the task of removing a glued mirror emerges. Welcome to our comprehensive guide, where we unravel the intricacies of liberating a mirror safely from the wall. Whether you're a seasoned DIY enthusiast or a first-time changer, this journey promises to be an exploration of precision and care.
In the upcoming sections, we will delve into the nuances of understanding the glued attachment, gathering the essential tools, implementing heat for safe loosening, and mastering precision with the utility knife. Each step is a brushstroke, contributing to the canvas of change, and we're here to guide you through this transformative process.

Understanding the Glued Attachment:
Removing a glued mirror requires a nuanced approach, beginning with a comprehensive understanding of the glued attachment. In this section, we'll delve into four key points to unravel the intricacies of how mirrors are affixed to walls with adhesive.
1. Identifying the Adhesive Type:
The first step in deciphering the glued attachment is identifying the type of adhesive used. Different mirrors may be affixed with various adhesives such as mastic, construction adhesive, or mirror adhesive. Understanding the specific adhesive type informs the removal strategy, ensuring a tailored approach for a successful outcome.
Tip: Research the mirror or wall specifications, or consult the manufacturer, to determine the adhesive type used.
2. Assessing the Extent of Adhesion:
Once the adhesive type is identified, assess the extent of adhesion between the mirror and the wall. Determine if the adhesive is applied uniformly or if there are concentrated areas of adhesion. This evaluation guides subsequent removal steps, helping you anticipate potential challenges and customize your approach accordingly.
Tip: Gently tap the mirror to listen for hollow or solid sounds, indicating areas of lesser or greater adhesion.
3. Researching Suitable Removal Methods:
Different adhesives respond to distinct removal methods. Researching and understanding the most effective techniques for the identified adhesive type is crucial. Common removal methods include using heat to soften the adhesive, employing a utility knife for precision cutting, or utilizing solvents for adhesive dissolution. Knowing the appropriate method minimizes the risk of damage to the mirror or the wall.
Tip: Seek guidance from DIY forums, manufacturer recommendations, or expert advice for tried-and-true removal methods.
4. Evaluating Wall Surface Tolerance:
Consider the tolerance of the wall surface to external factors, especially heat. Some walls may be more sensitive to temperature changes, and excessive heat could lead to damage. Evaluate the composition of the wall – whether it's drywall, plaster, or another material – and ensure that the chosen removal method aligns with the wall's tolerance levels.
Tip: Conduct a small test in an inconspicuous area to assess the wall's response to heat or other removal methods.
Unerstanding the glued attachment sets the foundation for a successful mirror removal process. By identifying the adhesive type, assessing adhesion levels, researching suitable removal methods, and evaluating wall surface tolerance, you equip yourself with the knowledge needed to approach the next steps with confidence. This nuanced understanding ensures a tailored removal strategy, fostering a smooth and effective mirror liberation.
Gathering the Essential Tools:
To embark on the journey of safely removing a glued mirror, having the right tools at your disposal is paramount. Here, we explore three key points to guide you in gathering the essential tools for a smooth and secure removal process.
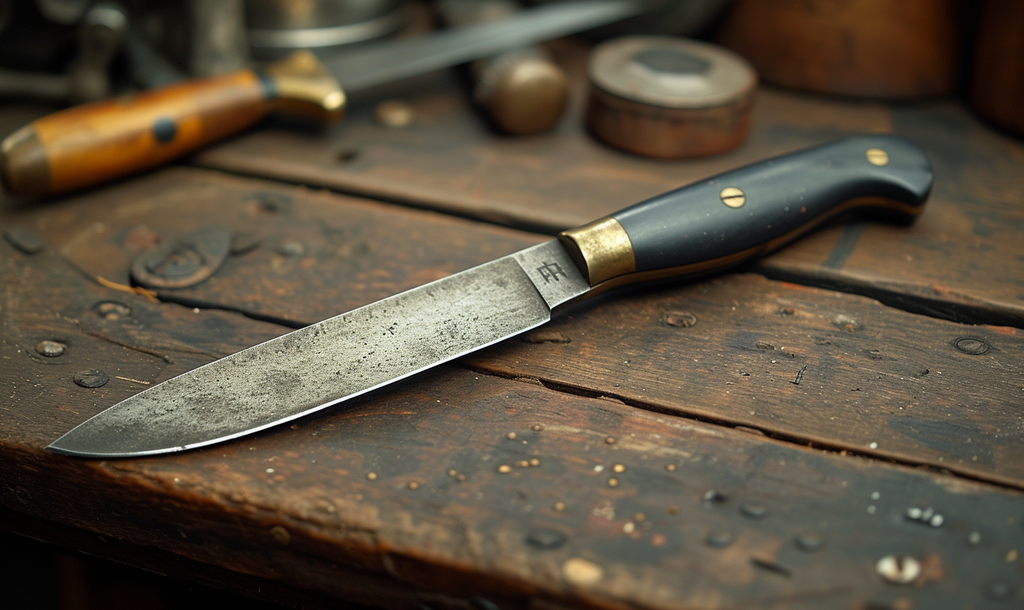
1. Utility Knife for Precision:
A utility knife is your go-to tool for precise and controlled cutting during the mirror removal. Choose a utility knife with a sharp and retractable blade, allowing you to navigate along the edges of the mirror with finesse. The utility knife is instrumental in cutting through adhesive, ensuring a clean separation without causing unnecessary stress to the mirror or the wall.
Tip: Opt for a utility knife with a comfortable grip to enhance precision during cutting.
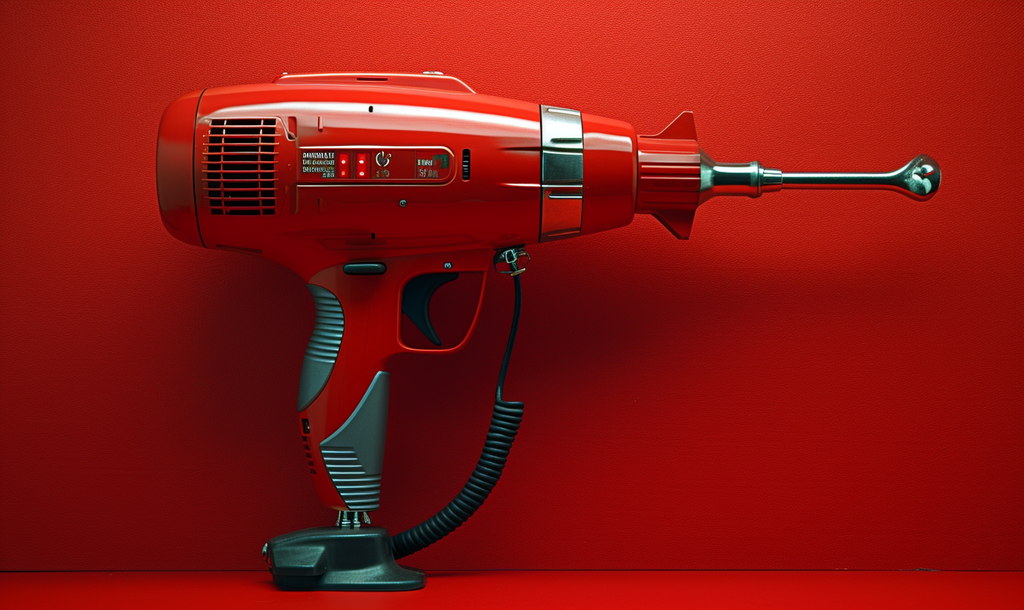
2. Heat Gun or Hairdryer for Loosening Adhesive:
Introducing controlled heat is a strategic element in softening the adhesive that binds the mirror to the wall. A heat gun or a hairdryer serves this purpose effectively. By gently applying heat to the edges of the mirror, you facilitate the loosening of the adhesive, making the subsequent removal steps more manageable. Ensure you maintain an even application of heat to avoid concentrated exposure in one area.
Tip: Keep the heat source at a moderate distance from the mirror, and continually move it to prevent overheating.
3. Safety Gear for Personal Protection:
Prioritizing personal safety is non-negotiable during mirror removal. Equip yourself with safety gear to shield against potential hazards. Gloves provide protection against sharp edges and prevent injuries, while safety glasses safeguard your eyes from debris. Considering the delicate nature of mirror removal, these safety measures ensure a secure and injury-free process.
Tip: Choose gloves with a good grip to maintain dexterity, and opt for safety glasses with side shields for comprehensive eye protection.
In conclusion, gathering the essential tools is a pivotal step in the mirror removal process. The utility knife empowers you with precision during cutting, the heat gun or hairdryer aids in loosening adhesive, and safety gear ensures your personal protection throughout the procedure. As you assemble these tools, you are not just preparing for a task; you are arming yourself with the means to liberate the mirror gracefully and embark on a transformative journey.

Implementing Heat for Safe Loosening:
When it comes to removing a glued mirror, introducing heat is a strategic step in softening the adhesive and easing the loosening process. In this section, we'll explore four key points guiding the effective implementation of heat for safe loosening.

1. Applying Even Heat Across the Mirror Edges:
To achieve optimal results, it's crucial to apply heat evenly across the edges of the mirror. This uniform application ensures that the entire perimeter of the mirror experiences a gradual temperature increase, facilitating a consistent softening of the adhesive. Use a heat gun or hairdryer with adjustable settings to maintain control over the heat distribution.
Tip: Move the heat source in a sweeping motion, covering all edges systematically for uniform heating.
2. Testing the Adhesive's Responsiveness to Heat:
Before attempting to loosen the mirror, it's prudent to test the adhesive's responsiveness to heat. Apply moderate heat to a small, inconspicuous section of the mirror and observe the reaction. Responsive adhesives will exhibit signs of softening, such as a change in texture or a slight separation between the mirror and the wall. This preliminary test ensures that the adhesive is receptive to the heat application.
Tip: Begin with a lower heat setting and gradually increase if needed, monitoring the adhesive's reaction.
3. Exercising Patience During the Loosening Process:
Patience is a virtue when implementing heat for mirror loosening. Allow sufficient time for the heat to penetrate and soften the adhesive gradually. Rushing this step may lead to incomplete loosening, making subsequent removal more challenging. Depending on the adhesive type and the size of the mirror, the process may take several minutes.
Tip: Be attentive to subtle changes, such as the adhesive becoming more pliable, before proceeding to the next steps.
4. Ensuring the Wall Surface Can Withstand Heat:
While heat is effective in softening adhesive, it's essential to consider the tolerance of the wall surface to temperature changes. Certain wall materials, such as drywall or plaster, may be more sensitive to heat. Before proceeding, assess the wall's composition and ensure it can withstand the applied heat without incurring damage.
Tip: If uncertain about the wall's tolerance, conduct a small test in an inconspicuous area before proceeding with the entire mirror.
In conclusion, implementing heat for safe loosening is a pivotal phase in the mirror removal process. By applying even heat, testing the adhesive's responsiveness, exercising patience, and ensuring the wall surface's tolerance, you set the stage for a smoother and more controlled mirror liberation. This strategic use of temperature is not just about making the adhesive pliable; it's about orchestrating a symphony of heat that harmonizes with the delicate dance of mirror removal.
Precision with the Utility Knife:
The utility knife is your instrument of precision when delicately separating a glued mirror from the wall. Here, we break down the precision process into two essential steps.
1. Controlled Cutting along the Edges:
Begin by gliding the utility knife with utmost control along the edges of the mirror. The sharp, retractable blade allows for precise cutting, ensuring that you follow the contours of the mirror seamlessly. Maintain a steady hand and a gentle touch, preventing any unnecessary stress on both the mirror and the wall. This controlled cutting is the foundation of a clean separation.
Tip: Align the knife parallel to the mirror edges for optimal control and precision.
2. Steady and Meticulous Repetition:
Precision with the utility knife is not a one-time affair; it's a meticulous repetition until the mirror is fully detached. Continue the cutting process, ensuring each stroke is deliberate and controlled. Exercise caution to avoid sudden movements that could lead to breakage. The repetition of steady and meticulous cutting ensures that the adhesive is gradually and evenly severed, allowing for a smooth and controlled removal.
Tip: Prioritize patience and attention to detail, ensuring each cut contributes to the overall success of mirror liberation.
In conclusion, precision with the utility knife is a delicate dance in two steps – controlled cutting along the edges and steady, meticulous repetition. This process is not merely a technical task; it's an art that requires finesse and care. Mastering the utility knife ensures that the mirror removal is not only successful but also a testament to your ability to navigate the intricacies of this intricate dance with precision.

Conclusion:
As we conclude this guide on safely removing a glued mirror, it's not just about detaching glass from adhesive; it's about embracing change and transforming your living space. The process you've mastered goes beyond technicality; it's an artistic endeavor, a poetic dance with change.
You've understood the adhesive, gathered the necessary tools, applied heat with finesse, and wielded the utility knife with precision. Now, as the mirror stands liberated, your space awaits a new chapter. It's time to assess the potential of those bare walls and envision a refreshed aesthetic.
Take a moment to revel in the satisfaction of a task well done. Share your experiences, insights, and newfound perspectives in the comments below. Your journey might inspire others embarking on a similar transformation. Remember, removing a glued mirror is not just about altering your living space; it's about crafting an environment that resonates with your evolving vision.
As you stand amidst the possibilities of change, consider this not just as a home improvement project but as a testament to your ability to adapt and create. Your space is now a blank canvas awaiting your artistic touch. So, with newfound confidence, creativity, and a space ready for reinvention, step into this next chapter, where each reflection tells a story of transformation and the beauty that lies in embracing change.
FAQs: Frequently Asked Questions
Q: Can I reuse a mirror after it has been glued to the wall?
A: Yes, carefully removed glued mirrors can often be reused or repurposed.
Q: What if the mirror is extremely heavy?
A: Enlist assistance, use proper safety measures, and consider professional help for very heavy mirrors.
Q: Can I use a regular knife instead of a utility knife?
A: A utility knife is recommended for precision and safety during the removal process.
Q: How do I protect the wall during removal?
A: Use drop cloths or cardboard to shield the wall from any potential damage.
Q: Is it possible to remove a glued mirror without heat?
A: While heat makes the process easier, it's possible to remove a glued mirror without it, but caution is needed.Call to Action: Embrace Transformation, Share Your Mirror Liberation Journey!

Call to Action: Embrace Transformation, Share Your Mirror Liberation Journey!
As you stand at the culmination of the mirror removal process, a world of possibilities unfolds before you. Now is the time to embrace the transformative power of change and share your mirror liberation journey.

1. Document Your Experience:
Capture the moments of mirror removal – the meticulous steps, the challenges overcome, and the satisfaction of a job well done. Whether through photographs, videos, or a detailed recount, document your experience. Your journey may inspire and guide others contemplating a similar transformation.
2. Share Your Insights:
The intricacies of mirror removal are enriched by personal insights. Share tips, lessons learned, and unexpected discoveries. Whether it's a unique approach to using the utility knife or a creative use for the liberated mirror, your insights can be valuable to those embarking on their mirror liberation adventure.
3. Engage with the Community:
Join the conversation! Engage with a community of DIY enthusiasts, home decor aficionados, and individuals seeking change. Share your challenges, seek advice if needed, or simply revel in the collective wisdom of a community bonded by a shared passion for home transformation.
4. Showcase Your Transformed Space:
After the mirror is removed, your space is ready for a new chapter. Showcase the transformed area – the blank canvas that awaits your creative touch. Share before-and-after pictures, decorating ideas, or plans for the refreshed space. Your transformation can spark inspiration in others contemplating change.
5. Seek and Provide Support:
Whether you've mastered mirror removal or are on the journey, the community is here to support you. Ask questions, seek advice on upcoming projects, or share your expertise with others facing challenges. The collective knowledge within the community can be a powerful resource as you continue your home improvement endeavors.
In conclusion, your mirror liberation is not just a solitary task but a shared experience within a community of like-minded individuals. Embrace the call to action by documenting, sharing, engaging, showcasing, and seeking support. Your journey contributes to a collective tapestry of transformation, where each story adds a unique thread. So, step into this vibrant community, be a source of inspiration, and revel in the beauty of a space that evolves with the creative spirit of change!

Mastering the Art of Wall-Mounted Elegance

How to Choose a Coffee Table